

DIY Home Decor: Mixed Media Wall Art
It’s all about the layers!
You can create amazing wall art using multiple techniques layered in your piece - with the right instructions. But sometimes - a picture is worth a thousand words, truly.
No time to read this now? Pin it for later!
So I broke out two of the more complicated techniques I used to create a bright colored, floral word art piece for my gallery wall - and put them into a short video. You can watch that here, or scroll on by and catch the complete supply list and step-by-step instructions below.
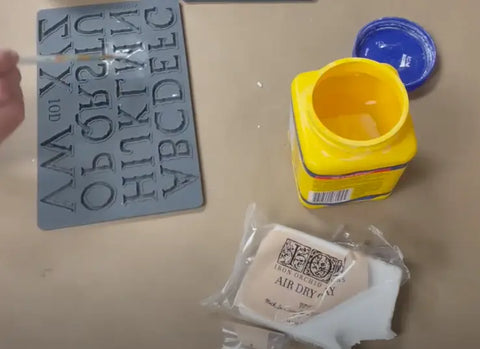
HERE’S EVERYTHING YOU’LL NEED TO MAKE YOUR OWN MIXED MEDIA WALL ART
To create your own piece you’ll need:
Hawaiian Hibiscus Milk Paint by Fusion Paint
Heat gun
Plastic tool (PRO TIP: the plastic applicator from Painterly Floral Transfer)
Titebond Quick + Thick Glue
Even though the video tutorial walks you through two of the techniques used in making this mixed media wall art piece, let’s walk through your initial steps.

STEP 1: Paint the Gallery Wood Blank
Grab the paintbrush and the Hawaiian Hibiscus Milk Paint and prepare the paint according to the package instructions. Once it’s ready - give the wood blank a complete coverage with the paint and then let it dry completely.
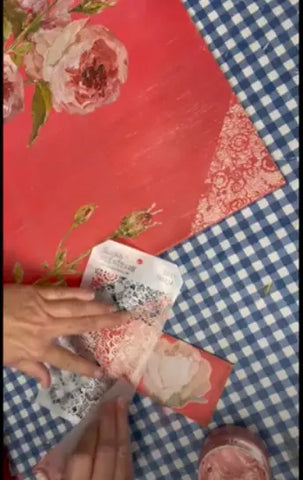
STEP 2: Add Painterly Floral Transfer
I picked some pieces from the transfer that would frame my art piece, creating a space for the words I’ll add later from IOD Mould castings.
This is where you open the door to your own creativity and choose the florals that call to you from the IOD Transfer. Take a look at my finished piece to see how I developed my composition by creating a floral frame with the transfer pieces I used.
One tip for applying a transfer to any project surface, you don’t need to rub-on the transfer using a lot of pressure. Try to “catch a bubble” on the transfer and lift off the backing a bit to peek. Replace the backing and rub-on any bits remaining on the backing.
Now let’s continue with the techniques in the video.
STEP 3: Cast The Letters For Your Word Art
Before you put any Air Dry Clay into your mould, take a paintbrush and brush in some cornstarch. This will help the casting release more easily from the mold. My favorite technique is to pop the mould into the freezer for 3-5 minutes. The castings pop out easily when they come out of the freezer.
Now take a bit of clay from the package, then immediately put the open package of clay into a ziplock bag. It dries fast! And taking this extra step will preserve the rest of the clay - an economic tip!
Push the clay into the letter as you begin to spell out your words. This is not a difficult step in the process - it just takes time. And you need to take your time. There are so many tiny details in the mold and they’re delicate. Perform each step carefully and methodically.
Once the clay has completely filled the letter, take a flat tool (I’m using the rub-on transfer plastic applicator from the Painterly Floral transfer) and scrape off the excess clay. A flat back on the casting will help it adhere when you apply the glue.
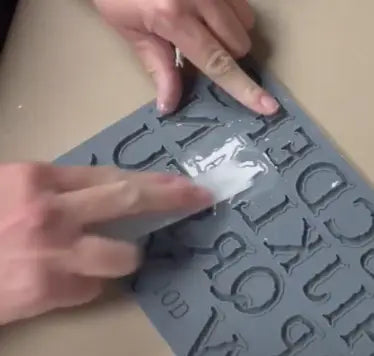
You’ll see the back of the silicone moulds have a micro rim around the edge of each impression. This helps get the excess clay off by using it as a guide. (min1:05 to see this illustrated in the video)
You can use a metal tool, like a putty knife, but be careful it doesn’t cut into the soft silicone mould. You can also run your finger around the micro rim to scrape off excess clay.
STEP 4: Removing The Castings
Turn your mould upside down and begin to gently roll back the edge of the mould to start the release of your casting. I started with the letter M in the Victoria Mould and it’s leggy, delicate, and has wonderful details. Using the tip of the plastic tool to assist the removal, I gradually release the letter. (2:36)
Repeat steps 3 and 4 to spell out the words you’ve chosen for your wall art. Don’t forget to brush in cornstarch before you fill each impression with clay. I like to get all the letters completed before I begin gluing them to the project surface with the Titebond glue.
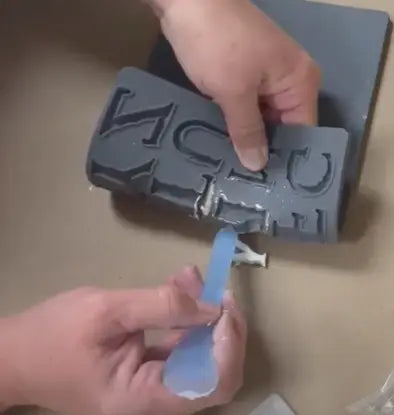
[Remember to keep the IOD Air Dry Clay safely zipped up in the ziplock baggie!]
STEP 5: Add Letters to Build Words
Carefully lay out the letters on your project surface to get the words where you want them. I like to take one letter casting at a time and apply the Titebond glue to the back with my fingertip before placing it back down and gently pressing.
Use a wet wipe or paper towel to remove any excess glue. Continue this process until your words are glued completely. Then let this dry 24 hours, minimum. I rubbed on some of the metallic paste to the letters to give them that pop the piece needed.
STEP 6: Embossing with a Stencil
At the end of the video, you’ll see what looks like a new craft project, but it’s a demonstration of using a stencil to add the Posh Chalk Metallic Paste. This technique and product will add depth and dimension to your mixed media piece.
I use a lacy floral stencil from the Tim Holtz Collection. In the video, I’m adding this to a wood tag that I’ve painted and used a bit of the Painterly Floral Transfer on. But check out the finished picture of my mixed media wall art piece - and you’ll see the embossing in the top right corner.
Here’s how I did it:
I lay the stencil across the project surface to apply the paste across the back of the stencil. The paste will fill in the stencil opening, but it’s important to apply carefully and wipe back or scrape the excess paste off.
Once you’ve covered the stencil, carefully lift it from the surface. Any excess paste can be removed with a paper towel. (7:13) I use some excess on my fingertip to rub along the corner edges of the piece, giving it more of a finished look.
Hint: The paste dries very hard, so it won’t smudge or come off when you’re done.
STEP 7: Getting The Depth
Alone, the metallic paste stenciled on the wall art looks great. But the next step will give you the interesting depth and texture that makes the piece stand out.
Grab a crafting heat gun and hold it back from the surface about 10” to a foot to apply the heat to the paste. Be careful not to get the heat on the transfer pieces, and make sure it’s not too close to the surface or the paste will bubble.

As the heat is directed to the paste, you’ll begin to see it puff up. (8:01) The metallic paste adds a hammered metal look to the surface - literally putting the mixed media into your project!
And you have now created a beautiful piece of wall art that will stand out in your gallery wall, fill in the perfect spot in your kitchen, or pop off a bathroom wall!
Go ahead and give this project a try. You’ll be amazed at how easy it is to master these techniques, and once you’ve got them down - the creative sky’s the limit! Don’t forget to send me pictures of your completed projects.